Installation
Virtual environment
The preferred method to install Cosmic-CoNN is to create a new Python virtual environment to avoid dependency issues. We use Anaconda to manage virtual environments and use pip to manage packages:
Anaconda installation documentation: https://docs.anaconda.com/anaconda/install/
Create a new virtual environment in Python version 3.7 named “cosmic-conn”:
$ conda create --name cosmic-conn python=3.7 -y
Activate this environment:
$ conda activate cosmic-conn

if failed, try
$ source activate cosmic-conn
Install for a CUDA-enabled GPU
Note
If you are using a Mac or a computer without a dedicated Nvidia GPU, please continue to Install for CPU.
We build Cosmic-CoNN with PyTorch, a machine learning framework that excels with GPU acceleration. In order to detect CRs quickly, it’s helpful to determine if your machine has a CUDA-enabled graphics card and configure PyTorch for GPU before installing Cosmic-CoNN.
A list of CUDA-enabled Nvidia GPUs https://developer.nvidia.com/cuda-gpus
NVIDIA CUDA Installation Guide for Linux https://docs.nvidia.com/cuda/cuda-installation-guide-linux/index.html
There are many resources online to help you configure the right Nvidia driver and CUDA library. A simple way to verify the correct setup is with the command:
$ nvidia-smi
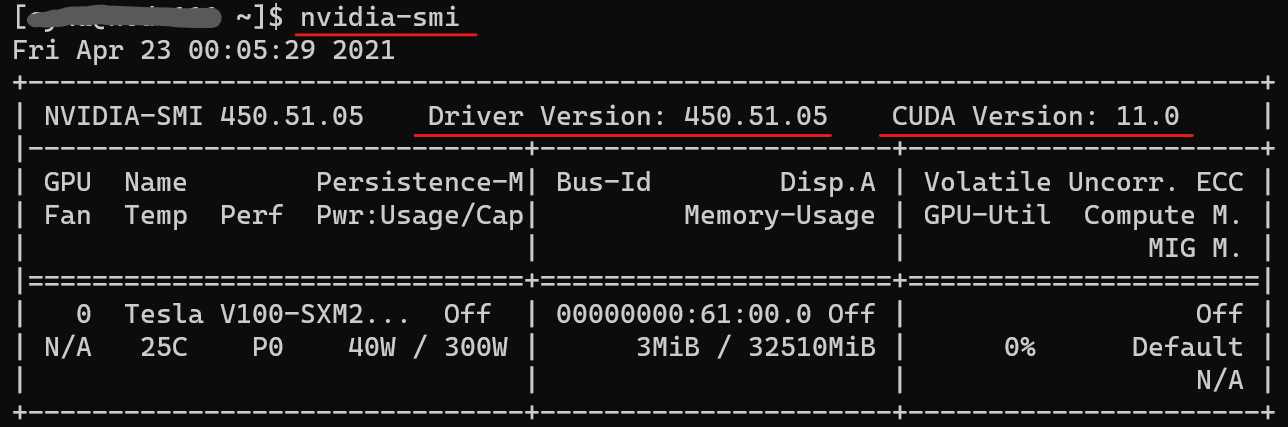
If you see a similar output, congratulations! You are very close to enjoy GPU acceleration. Now please visit PyTorch installation guide to generate the correct installation command based on your environment: https://pytorch.org/get-started/locally/. Select one of the CUDA versions for the Compute Platform condition.
To verify PyTorch is correctly configured for GPU, you should see:
import torch

torch.cuda.is_available()
>>> True
Continue with Install for CPU to finish the installation. Since you have PyTorch configured for GPU already, it will be ignored in the next section.
Install for CPU
Note
Detection time varies based on data and hardware. Although it is easy to achieve ~10x speed up with GPU acceleration, processing time on CPU is not slow. A regular laptop with AMD Ryzen 5900HS CPU takes only ~7s to process a 2009x2009 px image from LCO’s 2-meter telescope.
Test users, because we have not released the package to Pypi, please install the testing Wheel package below:
Install with pip:
# basic install for CR detection or library integration
$ pip install cosmic-conn

# include Flask for the web app interface
$ pip install cosmic-conn[webapp]

# install all dependencies for development
$ pip install cosmic-conn[develop]
Or install from the source (repo is still private, please use the method above):
$ git clone https://github.com/cy-xu/cosmic_conn
$ cd cosmic_conn
$ pip install .
If you are actively developing the package, this allows you to see changes of the code without having to re-install every time:
$ pip install -e .
Alternatively, if you prefer to install in your current Python environment, you could force pip to ignore dependencies so it does not upgrade other packages. You will need to manually install the missing packages:
$ pip install --no-deps .
Test installation
Please refer to the User Guide to test the installation.
Questions
Ask a question in our Github repo’s Discussion section: https://github.com/cy-xu/cosmic_cnnn/discussions